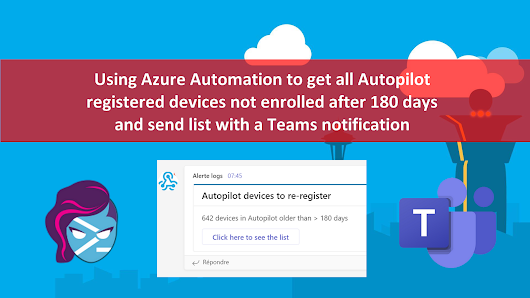
Using Azure Automation to get all Autopilot registered devices not enrolled after 180 days and send list with a Teams notification
In this post we will use Azure Automation and PowerShell to list in a CSV all devices that have been registered in Autopilot and not enrolled in Intune after 180 days and send a Teams notification.
Devices not enrolled after 180 days ?
Let(s take the below context:
- You have import a
device to Autopilot (using the CSV for instance)
OR
- Manufacturer has
registered devices in your tenant
- Devices have not
been enrolled in Intune after 180 days
What does it mean
not enrolled ?
When you import a
device in a tenant, sometimes you don't need to install to now and you let it in
Autopilot part.
When you install successfully a device with Autopilot it will be considered as enrolled.
You can find more information there.
For this post I have been inspired by Peter Klapwijk who did check the same with Logic App.
The solution
The solution is
the below one:
- Use Azure
Automation
- Create an Azure
Automation runbook
- The runbook get
all autopilot devices not enrolled
- Get Azure
device ID for those devices
- Get the
creation date of those objects
- Check if date
is > 180 days
- If yes export
list to CSV
- Send the CSV to
SharePoint
- Send Tams notif
with link of CSV
Get the script
Click on the
below GitHub picture to get the script
How to use the
script ?
SharePoint
information
Add information
relative to your SharePoint app line 29 to 32.
Add your
webhook in the $Webhook_URL variable.
Teams notification
The teams notification looks like as below:
You can easily configure it in the ps1 file.
Managed identity
The Azure
Automation script works with a managed identity.
We will see later how to use it.
Choose old devices delay
The script will
automatically check for devices not enrolled after 180 days.
You can change
the delay line 83.
Creating the
SharePoint application
We will create a
SherPoint application to upload devices list.
For that check my
post here.
Creating Teams
webhook
Purpose: In this
part, we will create a connector on a Teams channel allowing us to automate
ability to send Teams notif.
For that, we will
proceed as below:
1. Go to your
channel
2. Click on the
...
3. Click on
Connectors
4. Go to Incoming
Webhook
5. Type a name
6. Click on
Create
7. Copy the
Webhook path
Azure Automation
account
Creating the
account
1. Go to Azure
2. In the search
bar type: Automation accounts
3. Go to
Automation accounts
4. Click on
Create
5. Type a name
6. Choose a
Subscription
7. Choose the
Resource group
8. Choose your
region
9. In Create Azure Run As Account, select No
10. Click on
Create
11. Wait a bit
12. Click on Go
to resource
Adding modules
1. Go to your
automaton account
2. Click on
Modules gallery
3. Search:
pnp.powershell
4. Click on
pnp.powershell
5. Click on
Import
6. Click on OK
Set Managed
Identity
1. Go to your
automation account
2. Go to Identity
(Preview)
3. Go to System
assigned
4. Select On
5. Click on Save
6. Click on Yes
Adding
permissions
Once the Managed
Identity has been configured a new Enterprise application will be created.
Then you need to add permissions to do some actions, there permission to get info from the Autopilot events part.
The required
permission is the following:
- DeviceManagementServiceConfig.Read.All
(for autopilot devices)
- Device.Read.All(for
Azure AD devices)
To add this
permission you will need to use PowerShell, it can't be done through the
portal.
For that use the
script Assign_permission on my GitHub repo.
You just need to
fill below variables:
- $TenantID: your
tenant ID
-
$DisplayNameOfMSI: name of your automation account
Azure Automation
Runbook
Creating a
Runbook
1. Go to Azure
2. In the search
bar type: Automation accounts
3. Go to your
Automation accounts
4. Go to Runbooks
5. Click on +
Create a runbook
6. Type a name
7. In Runbook
type, select PowerShell
8. Click on
Create
Add script in
Runbook
The runbook
script is located downloaded sources
Its name is: Runbook_script.ps1
Test the Runbook
1. Click on Test
pane
2. Click on Start
3. Once finished,
you should see Completed
Publish the
Runbook
1. Go to your
Runbook
2. Click on Edit
3. Click on
Publish
4. Click on Yes
Schedule the Runbook
1. Go to your
Runbook
2. Click on
Schedules
3. Click on + Add
a schedule
4. Click on Link
a schedule to your runbook
5. Click on + Add
a schedule
6. Type a
schedule name
7. In Recurrence,
select Recuring
8. Click on
Create


Enregistrer un commentaire