
Upload files to SharePoint/Teams using PowerShell and Graph API and no module

In this post I will show you how to upload files on SharePoint/Teams with PowerShell, Graph API and without any modules.
Context
- You have a SharePoint site
- You want to upload file on SharePoint
- You don't want to use a module
In this post I will show you how to use directly Graph API without any modules to upload a file on a specific SharePoint site.
Before I used pnp.powershell module and that worked pretty well, see my post here.
However since some new release of the module I have some issues.
That's why I decided to proceed without module to avoid any issues relative to module update.
Hoes does it works ?
That's pretty simple, we will proceed as below:
- Create an Azure app registration
- Add permission to the app
- Add a secret or certificate*
- Use PowerShell and Graph
*In my case I will add a secret, I will soon update the post to use a certificate
Getting SharePoint site id
The first step in order to upload something is to identify the SharePoint site on which we want to send file.
For this we need the SharePoint site path and ID.
The SharePoint site path is pretty easy to get, in my case it's the below one:
https://systanddeploy.sharepoint.com/sites/Support
Now to get the ID of a SharePoint site proceed as below:
1. Open your browser
2. Type the following URL:
https://yoursharepoint.sharepoint.com/sites/yoursite/_api/site/id
In my case it's:
https://systanddeploy.sharepoint.com/sites/Support/_api/site/id
Create the Azure app
1. Go to Azure portal
2. Go to App registrations

3. Click on New registration

4. Type a name for your app
5. Let by default and click on Register
6. Go to Overview
Adding permission
Permission for all sites
Here will add a permission larger that can act on all sites.
1. Go to API permissions

2. Click on Add a permission
3. Select Microsoft Graph

4. Select Application permissions

5. Check Sites.ReadWrite

6. Click on Add permissions
7. Click on Grant admin consent
Permission for specific site
Now to only add permission on a specific SharePoint site, proceed as below:
1. Go to API permissions
2. Click on Add a permission
3. Select SharePoint

4. Select Application permissions

6. Check Sites.Selected
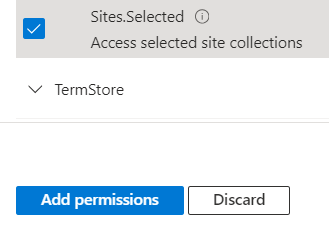
7. Click on Add permissions
8. Click on Grant admin consent

Here we have added permission sites.selected.
Now given that it's for a specific selected site we need to identify the selected site.
To do this, proceed as below:
1. Open Graph Explorer here
2. Choose method POST

3. In url type the below one and replace sharepointsiteid with your SharePoint site id
https://graph.microsoft.com/v1.0/sites/sharepointsiteid/permissions
4. Go to Request body

5. Type the below body by replacing specified fields
6. Click on Run query

7. If you have an error 403 forbidden in Graph Explorer, click on Modify permissions
8. There you will find a permission to allow, so allow it
9. Click again on Run query
Create a secret
If you want to use a secret proceed as below:
1. Go to Azure portal
2. Go to your Azure app
3. Click on Certificates & secrets

4. Click on New client secret

Upload content to SharePoint
To connect to our SharePoint site using our Azure application we will need:
- The SharePoint site URL
- The Azure app client ID
- The Azure app thumbprint or secret
- The path of the file to upload
To get the script click on the below GitHub picture


1 commentaire
I'm very interested by your certificate version of the connection. Can't figure out anything about this one without relying on the MSAL.PS or some other modules available out there.
Best,
EM
Enregistrer un commentaire