
Scheduling a purge of files in a SharePoint using Azure Automation and PowerShell

In this post I will show you how to use Azure Automation and PowerShell to schedule a purge of files on a SherPoint site.
Context
You have a SharePoint that have a lot of file.
Let's take my previous example here.
I created a Teams/SharePoint to store logs sends from devices for support team.
This can take a huge size very fast.
The idea is to purge all files older than a delay.
The solution
The solution is the below one:
- Create a SharePoint application
- Create an Azure Automation runbook
- The runbook will use the SharePoint application
- It will access a specific SharePoint
- It will check for files older than 90 days
- It will delete all those files
- Send a Teams notification about the purge
Get the script
Click on the below GitHub picture to get the script

How to use the script ?
SharePoint information
Add information relative to your SharePoint app line 29 to 32.
Add your webhook in the $Webhook_URL variable.
Teams notification
The teams notification looks like as below:
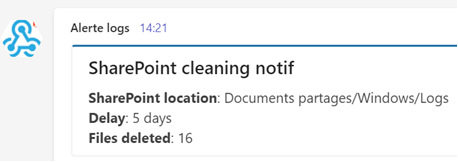
You can easily configure it in the ps1 file.
Choose clean delay
The script will automatically check for files that are older than a specific delay.
To change it edit the variable $Purge_Delay.
Other parameters
To specificy the content to cliean, meaning which folder on SharePoint, search variable ContentToClean and type your path.
By default, files will be remove from SharePoint but keep in the recycle bin.
To remove them also from the SharePoint recycle bin, add parameter -NoRecycle to the Purge_SharePoint.
Creating the SharePoint application
We will create a SherPoint application to upload devices list.
For that check my post here.
Creating Teams webhook
Purpose: In this part, we will create a connector on a Teams channel allowing us to automate ability to send Teams notif.
For that, we will proceed as below:
1. Go to your channel
2. Click on the ...
3. Click on Connectors
4. Go to Incoming Webhook
5. Type a name
6. Click on Create
7. Copy the Webhook path
Azure Automation account
Creating the account
1. Go to Azure
2. In the search bar type: Automation accounts
3. Go to Automation accounts
4. Click on Create
5. Type a name
6. Choose a Subscription
7. Choose the Resource group
8. Choose your region
9. Click on Create
10. Wait a bit
11. Click on Go to resource
Adding modules
1. Go to your automaton account
2. Click on Modules gallery
3. Search: pnp.powershell
4. Click on pnp.powershell
5. Click on Import
6. Click on OK
Azure Automation Runbook
Creating a Runbook
1. Go to Azure
2. In the search bar type: Automation accounts
3. Go to your Automation accounts
4. Go to Runbooks
5. Click on + Create a runbook
6. Type a name
7. In Runbook type, select PowerShell
8. Click on Create
Add script in Runbook
The runbook script is located downloaded sources
Its name is: Runbook_script.ps1
Test the Runbook
1. Click on Test pane
2. Click on Start
3. Once finished, you should see Completed
Publish the Runbook
1. Go to your Runbook
2. Click on Edit
3. Click on Publish
4. Click on Yes
Schedule the Runbook
1. Go to your Runbook
2. Click on Schedules
3. Click on + Add a schedule
4. Click on Link a schedule to your runbook
5. Click on + Add a schedule
6. Type a schedule name
7. In Recurrence, select Recuring
8. Click on Create


Enregistrer un commentaire