
PowerShell and WPF: Generate Controls from the PS1
https://www.systanddeploy.com/2019/10/powershell-and-wpf-generate-controls.html

Usually when I create a GUI I use and XAML file for my GUI and PS1 for the code. In the XAML I add all my controls. In this post I will show you how to add and generate your Controls directly from the PowerShell script.
When it can be useful ?
In one of my futuretools, I display all monitors connected to the computer.
If you conect a new monitor and click on Refresh, a new block of Controls will be displayed.
See below an overview with one monitor (internal one):
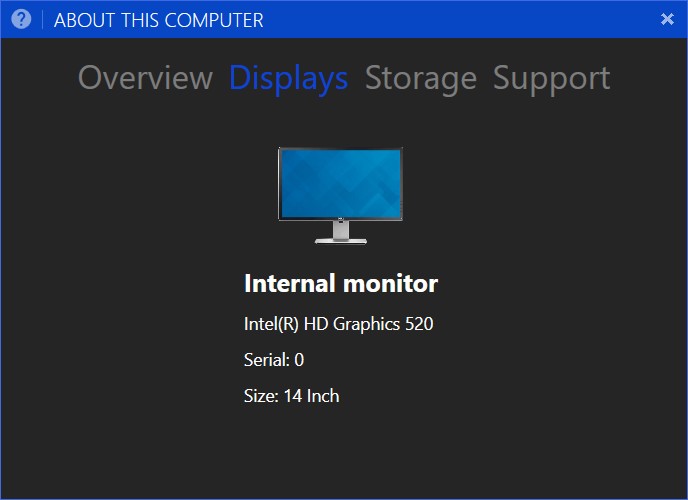
See below an overview after adding a external monitor:

In order to add all Controls in the GUI I generated all of them from the PS1. After clicking on refresh, it will check some WMI then if needed display a new monitor part.
We can also imagine another example that will display a progressbar for eacch hard disk connected with free space and total disk size.
This way when you click on the refresh button, if you have connected a new hard disk, a new progressbar will be displayed.
Before to see how to proceed, let's go back a bit to WPF Controls basic.
WPF Assembly
In order to create WPF project with PowerShell, you have to load a specific assembly.
This one is called presentationframework.dll
You can find it for instance in C:\Windows\assembly\GAC_MSIL\PresentationFramework.
We can load it using the below line:
What is it ?
This assembly contains all basic WPF Controls, events, properties...
If you search some Controls properties on Microsoft website, you will see that they probably belong to the presentationframework.dll assembly.
See below an overview for a button. It is located in the presentationframework assembly in the space name System.Windows.Controls (keep it in memory).

Explore the assembly
In order to understand better this asembly it can be interesting to explore it a bit.
We will use it to list available Controls.
With dsnspy
1 / Download dnsspy here
2 / Unzip the archive
3 / Open the file dnSpy.exe
4 / Once you open dnspy, you will see a list of assembly
5 / In the list you will see presentationframework
6 / Expand it
7 / Expand presentationframework.dll
8 / Go to System.Windows.Controls and expand it
9 / You will find all Controls


With PowerShell
1 / Use the two below lines:
2 / See below the result


3 / Now let's filter with system.windows.controls


4 / We can see for instance Controls Button or TextBox.
5 / We will list infomations for TextBox Controls using the below lines:
Generate Controls from PS1
Now let's attack the main part of our subject.
To create a new Control from a PowerShell script, you will need to create a new object, as below:
Replace MyControl with the Control to add.
See below a list of Controls and how to create them using object:
- StackPanel: New-Object System.Windows.Controls.StackPanel
- Image: New-Object System.Windows.Controls.Image
- Label: New-Object System.Windows.Controls.Label
- Button: New-Object System.Windows.Controls.Button
- Border: New-Object System.Windows.Controls.Border
To create a new Label you will have to use the below line:
Now we have created it, we can customize the object using attributes
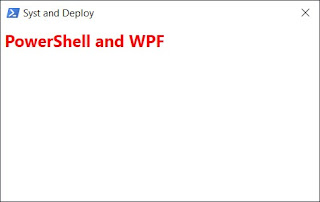
In the below sample we will customize the Label object as following:
- Name of the Control : MyLabel
- Text : PowerShell and WPF
- Text color : Red
- Text size : 20
- Police : Bold
See below the used script:
The Label is ready to display.
Now we have to specify where it should be displayed.
In the main XAML we will a Name to the Grid part, this way all Controls will be displayed into it.
See below the XAML part:
The Grid Name is MyDynamicControls.
Now we will need to add our initialied Label into MyDynamicControls.
For that we will add a child Control to the grid as below:
See below the full PowerShell script:
See below the result:

Now let's center the Label.
For that we use the following attributes: HorizontalAlignment, VerticalAlignment
See below the PowerShell part:
See below the result:
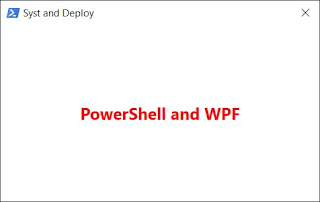

Now we will create a new Control StackPanel and add the Label into it.
As we want to display all at the center we will use the following attributes for the StackPanel: HorizontalAlignment, VerticalAlignment
See below the PowerShell part:
We will add the StackPanel in the Grid as below:
Now we will add our Label into the StackPanel, as below:
See below the PowerShell part:
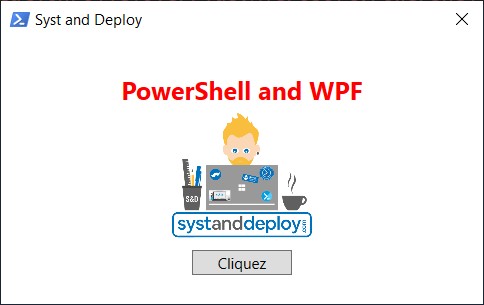
In the below example we will add the following Controls: Image and Button.
We will add them into the StackPanel.
See below the PowerShell part to add the Image:
See below the result:
See below the PowerShell part to add the Button:
See below the result:


We will use the attribute Margin and add it to the Image Control to put a little space between the button and the picture.
See below the result:


Enregistrer un commentaire